Create Advanced Merchandising Rules
This section provides instructions for creating rules in Advanced Merchandising, allowing retailers to create specific sets of recommendations. For more information about Advanced Merchandising rules, see Advanced Merchandising: Rules.
Note: Advanced Merchandising feature must be enabled by Algonomy for the site before you can create rules.
To create a new advanced merchandising rule:
- On the Omnichannel Personalization dashboard, go to Recommendations > Advanced Merchandising. The Advanced Merchandising page is displayed with the rules already created.
-
Click + Add Rule.

-
Add a rule name. Names are displayed on the Advance Merchandising page, but are not displayed on your site.
-
If you are an Advanced Merchandising publisher, you will see the Enable in production checkbox. Select this checkbox to start using the rule on your site. you can also enable and disable rules on the Advanced Merchandising page..
-
Select the Enable system filters and rules checkbox. Selecting this option allows Recommendation Restriction and Recommendation Boosting to apply to the results of this Advance Merchandising rule. It also allows the system filters to be applied.
-
Set how to treat duplicate products. The Remove Duplicates checkbox determines whether the rule allows products that have already been shown on the page to be displayed again. The Remove Duplicates checkbox is selected by default.
When an Advanced Merchandising rule qualifies for a placement and has the Remove Duplicates checkbox selected, then it removes all the products which have already been determined to be displayed by other placements. When this checkbox is cleared, products which have already been determined to be displayed by other placements are displayed when they qualify for the given rule.Note: Advanced Merchandising ignores the sitewide site configuration setting "allow duplicate items" and instead adheres to the Remove Duplicates setting in the individual rule. This does not apply for short name de-duplication - if the Advanced Merchandising rule is set to not remove duplicates, but short-name de-duplication is enabled in site configurations, the short-name de-duplication will still occur.
-
Set an importance level between 0 and 10. The Importance score determines the order in which rules are applied and serves as a tiebreaker if two rules are equally qualified for a placement, the higher number taking precedence.
-
Specify the start date from when the rule becomes active.
-
Specify the end date or select the No End Date checkbox to let the rule run indefinitely.
-
Click Select Placements to choose one or more placements where the rule applies.
Placements are locations on your site pages that can show recommendations. The following window is displayed with the available placements. Select the required placements or select Toggle all to select all placements. -
Specify the rule message. It helps customers to understand the reason for seeing a particular set of recommendations. The text you typed in the Rule Message field appears above the placement.


You can update the message at any time and the changes come into effect within 15 minutes.
-
Set the context. The Context is the set of products that causes the rule to trigger. You can set the context to be particular products, categories, brands, price or attributes (like colors or sizes) as well as rating.
-
Drag criteria from the bar on the left to the box Drag criteria here to build your rule conditions. For example, the rule you want to build should key off of the category Digital Cameras, drag the Category criteria.
-
Click Select categories to choose digital cameras.

-
Choose the IS or IS NOT condition.
-
Search for the category using Category ID or Category Name. When finished, click the checkmark button at the bottom of the dialog box.
-
Below the Context section, there will be a preview of items in the catalog that match the chosen context.
-
To include additional categories, click Add a Category condition and repeat steps 3 & 4. Toggle between the OR and AND conditions by clicking on the word.

- To clear the context, click Clear or X.
- To save the context as a template to be used again in the future, click Save as Template.
As you add context rules, you will see a preview of the products that will qualify. Select one to use for the recommendations preview (the next step). To appear in the context preview, a product must match all the context rules you set.
The product must also have appeared in the catalog feed in the last 30 days OR the Recommendable field must be set to true. Here are some examples:
A product that was updated in the catalog 5 days ago appears in the preview, whether it is recommendable or not.
A product that was updated 31 days ago only appears in the preview if it is currently recommendable.
This filters out old products that are no longer in use.
If more than 48 items qualify for the context, the preview shows a sampling of these items.
- Loading Context: Loading a saved template as context adds that template's context clause to the existing context. It doe not replace any existing context in that rule.
-
-
Determine if variety is desirable in your recommendations.
"Show variety" means that there is some variation in the recommendations shown for requests with identical context. For example, if you set your rule's context to be "Category is Digital Camera", then each Advanced Merchandising recommendation in the Digital Camera category will be the same. With variety enabled, products that are not explicitly at the top of the sorting order in a Recommended Items set can be selected, leading to a greater variety of products recommended.

-
To add a segment to your context, click on the arrow next to Segment. These can be Custom or User segments to help further define which shoppers should see the recommendations.
-
Build the list of recommended items. To add Recommended Items to the rule, click +Recommendation. This is where you define which products are recommended for the placement and context you just defined.
-
To create a Recommendations Group, specify the group a name and the number of items to recommend. For example, since we are working with digital cameras, you want to ensure that at least two memory cards are included in this recommendation.

-
Click Affinity or personalized sorting. The engine uses data about the customer to sort recommendations. Otherwise, leave it to the global sorting.
-
Following Affinity or personalized sorting options are available. Use the up/down arrow icons each to sort in ascending or descending order:
-
Affinity sorting: Select an affinity configuration from the dropdown list. This list displays all the affinity configurations set up on the User Affinity Configuration page.
-
Personalized sorting:
-
Frequently Bought Together in Session: This uses the wisdom of the crowd to figure out products that are frequently purchased if the seed is purchased, but specifically looks at the current session, and if the other products were purchased in the same session along with the seed. (SessionPurchaseCP)
-
Based on What Shopper has Purchased: This looks at products that are frequently bought with other products that the customer has recently purchased in the last 75 days. (PersonalizedPurchaseCP)
-
Frequently Bought Together outside of Category: Products that are frequently bought with the given seed product but do not belong to the primary category of the seed product. This also only recommends one product from each unique category (CategoryDiversePurchaseCP)
-
People who share multiple product views also viewed: Products that are frequently viewed with multiple products that the customer has viewed (MulitItemPersonalizedViewCP)
-
-
-
Following Global sorting options are available. Use the up/down arrow icons to sort in ascending or descending order:
-
Bought by shoppers who also bought seed: Products that are bought by customers who have bought the product targeted (PurchaseCP)
-
Viewed by shoppers who also viewed seed: Products that are viewed by customers who have viewed the product targeted (ClickCP)
-
Top Selling: Products that are top selling.
-
Price: This sorts based on the list price of the returned products.
-
- Notes:
-
The personalized and global sorting options can be Activated or Deactivated independently (unless Locked), and the relative priority can be adjusted by dragging the options into the desired order, left to right.
-
If enabled, Personalized sorting will take precedence over global sorting.
For example, see Build Cross-Sell Rules
-
-
Add a Product, Category, and Brand and set up the conditions to create the recommendation.

-
Click Save as Template to save this recommendation as a template to be used again.
-
To add a second recommendation group, click +Recommendation. Repeat the steps until you have completed setting up your bundle.
-
Similar to Context, you can save and load templates for Recommendation groups. Any loaded template is added to existing rule recommendation group clauses and does not replace those already set.
Omnichannel Personalization builds a preview list of products that match the rules you set up here, but this preview is built pre-model build, so it is not necessarily showing what the engine will ultimately recommend.
Omnichannel Personalization uses the rules you set up, starting at the top and going through the bottom, to pick the products to show in the list.
-
-
Click Save to the rule.

Note: Dates work on the Pacific Time zone.

Note: The placement controls the number of items from the list appear on the page. Ensure to recommend enough products to meet the minimum number required by the placement, or select the checkbox beside "Backfill remaining slots with recommendations" to allow the engine to fill the remaining slots. Backfill executes Experience Optimizer to determine the strategy to recommend additional products in the appropriate context, and fill products to the maximum slots allowed in the placement.
Notes
Working with Categories
When you build contexts and recommended items based on categories, Advanced Merchandising uses the categories included in the catalog feed. Additional category information provided through instrumentation is not used for Advanced Merchandising rules.
Items that belong to multiple categories consider all categories listed for the item in the catalog feed. For example, if a rule recommends items that are the same as the seed product and the seed product belongs to both the baby and electronics categories, then the rule considers items in the baby category and items in the electronics category.

Working with Attributes
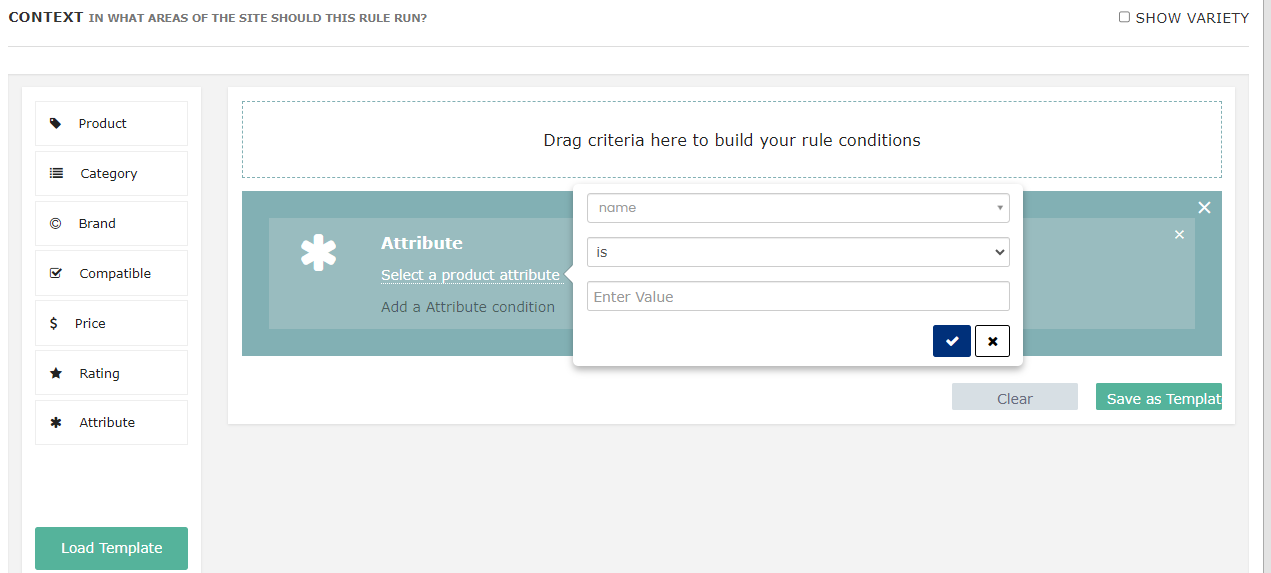
You can use product attributes to define your contexts and recommended items. When you use attributes as a selection criteria, choose the attribute you want to compare from dropdown.

From the next dropdown, choose the logic to use with the attribute.
For attributes, you must choose one of the following:
-
is (attribute matches the value)
-
is not (attribute does not match the value)
-
is in list (attribute matches a value in the comma separated list)
-
matches regex (attribute matches the regex pattern)
-
regex does not match (attribute does not match the regex pattern)
-
regex comparison
-
exists (the item has this attribute)
Working with Localized Attributes
When you use attributes as a selection criteria, and the site has localization enabled, you have the option to use localized attributes.
To use Localized Attributes:
-
If the attribute is selected as the context or recommendation group criteria, select the type of localization with which the localized attribute is associated. Possible value: Region, Language, or Currency.
-
If the localization type is selected, an additional dropdown appears that allows you to select the various localizations (region, language, or currency) by that type. Select the region/language/currency with which the localized attribute is associated.
-
Find your localized attribute in the list of attributes provided.
If you selected the correct localization type and the region/language/currency with which the selected localized attribute is associated, the localized attribute is leveraged in preview and recommendations where this rule is applied.
Note: You must know the localized attribute and the localization type with which it is associated to function properly. Localized attributes, when available, are listed along with the global attributes in the attribute selection list no matter what your localization selections are set to.
Working with Compatibility
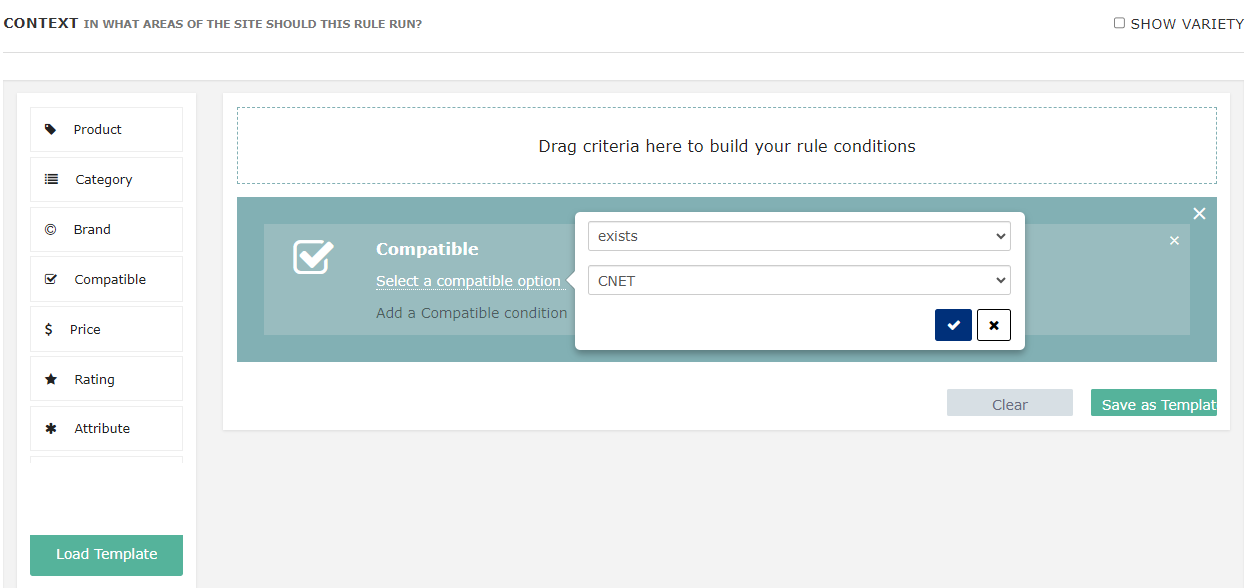
The compatibility list is a pre-curated list (by merchant), which contains product to product mapping. This can be used in Advanced Merchandising.
If you are providing custom compatibilities, then an additional option "Compatible" is displayed in the criteria list.

If multiple compatibility lists are available for you, then you can choose one from the dropdown.
Merchants can pass custom compatibility lists as an attribute in the product_attributes feed. Since compatibility is a special attribute, it should be prefixed by "MCMP.". For example, MCMP.accessories. Here, “accessories” is the name of compatibility that shows up in the dropdown at the time of the rule creation.
Working with Regular Expressions
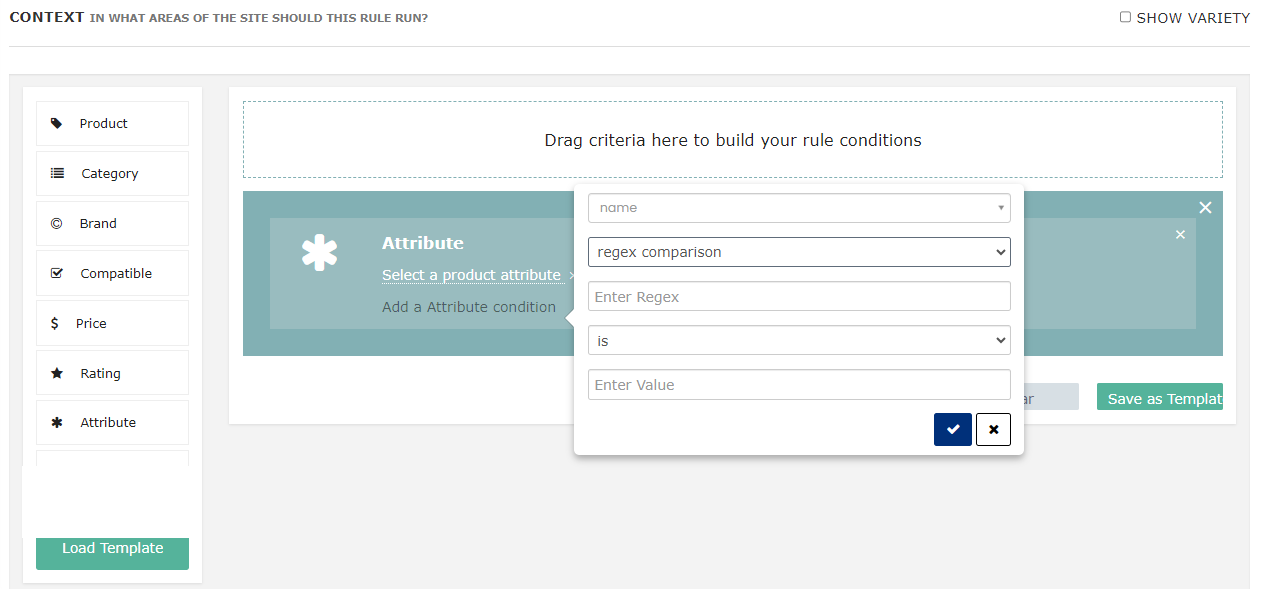
You can use Regular expressions to match part of or complete product name, brand or attribute value. In the below example, 'wineratingsource' has been set to match all values that start with 1102:Be to capture the products where Beer Advocate is the wine rating source; while 'winerating' has been set to match within 90-100. This results in products that are rated 90-100 by Beer Advocate.

It can also be used to capture a part of a text in a product's name, brand, or attribute value to compare with a value.
Regex Comparison to Seed Product
The regular expression matching functionality in Advanced Merchandising is slightly different than some other regular expression matching, which by default often look for the first occurrence of your match pattern in a string. When evaluating a regular expression the Advanced Merchandising, the matcher implicitly adds a beginning-of-line anchor (^) to the beginning of your expression and adds an end-of-line anchor ($) to the end. So when (\d+) is entered, the system reads the expression as ^(\d+)$. That match pattern tells the matcher that the match should only be successful if the whole string value consists only of digits, and there will be no match. Because attribute values are strings and can contain any sequence of characters you may only be wanting to capture a specific part of the string, not the entire string (for example, you may be trying to pull a specific number from the string into your capture group. To get around the implicit anchors, you can prepend and/or append .* to your match pattern.
Example attribute value: 389274_pairs_with_332786
If you want to pull the first number (389274) from the attribute value into a capture group, you can rewrite the expression like this, (\d+).* or if you only want the second number (332786), rewrite it like this, .*_(\d+) To grab the phrase "pairs_with", the match string could look like this: .*(pairs_with).*
When the first number is desired, enter: (\d+).*
System reads: ^(\d+).*$ - match
When the second number is desired, enter: .*_(\d+)
System reads: ^*._(\d+)$ - match
When trying to capture "pairs_with", enter: .*_(pairs_with).*
System reads: ^.*(pairs_with).*$ - match

Available Regex Operations
| Operation | Operation |
|---|---|
|
Matches regex |
Compares the regex pattern to text and returns results if positive. |
|
Does not match regex |
Compares regex pattern to text and returns results if negative. |
|
Regex comparison |
Captures the text matching the regex and compares to a value entered by the user. |
|
Regex comparison to seed |
Captures the text matching the regex and compares to a value in seed. |
Common Regex expressions
| Indicator |
Description |
Example |
|---|---|---|
|
^ |
The start of a text string |
^red - Find “red” at the beginning of the text |
|
$ |
The end of a text string |
blue$ - Find “blue” at the end of the text |
|
. |
Wild card that matches any character except newline (/n) |
.*red - Find “red” anywhere |
|
* |
Matches 0 or more of the previous characters |
.*red|blue - Find "red" or "blue" anywhere (| character denoting 'or') |
|
d |
Match any single digit (same as [0-9] ) |
(\d+\.?\d*) - Pick out a number from a string |
Additional Regex Notes
When searching for regex matches, Ensure that the number of matched products that are brought up as the count found does not match with the number of products in the context preview.
Example:
Create New Rule > Select Product in Context > Select matched regex and type regex (for example, .*Coffee)
Performing this action shows you a total of 242 matched products. When saved, the number of products in context preview are not matching with this 242 total.
This does not mean there is an issue with the matching function. The widget shows all matches including non-recommendable products, which can include some products that are not currently in the feed. This is so that non-recommendable and non-current products can be used as seeds. However, those types of products are not eligible to be included in the Context preview. This is where the inconsistency between the widget's matched products total and the products in context preview is coming from.